Showing posts with label kids art lesson. Show all posts

Friday, August 1, 2014

Preschool art inspired by Giacometti's elongated figures

August 1st happens to be the National Swiss Day . So I will take this chance to introduce you to one of the most famous Swiss sculptor and painter : Alberto Giacometti.

Grade Level:  I intended this art lesson for preschoolers and / or kindergartners . It is designed for children with a low attention span .

Material needed : For this project , you will only need :
                                        * Some chenilles or pipe cleaners (whatever you call them)
                                        *  A piece of white paper for each student
                                        * Some glue

Resources: You can find some informations on this Swiss artist and his work online . However let me summarize it a little bit for you .
             Biography : Alberto Giacometti was a Swiss sculptor and painter . He was born on October 10 1901 , in a town called Borgonovo , in the Southern part of Switzerland . He was the son of the post-impressionist painter Giovanni Giacometti . He was the oldest of four children . Two of his brothers (Diego and Bruno) will also become artist themselves .
                                  Alberto Giacometti , first studied art at the Fine Art School (Ecole des Beaux-Arts) in Geneva , Switzerland . He then moved to Paris , where he attended the sculpting class of Antoine Bourdelle (an associate of Auguste Rodin ).
                                   Alberto Giacometti is known for his paintings and drawings of slim subjects and his elongated sculptures such as "The three men walking II" (1949)  .
                                   He died in 1966 , in Chur , Switzerland , of heart disease .
                                   He is the face on the bill of 100 Swiss francs .

               Art: Among his work , are the following (that you can show your students) :
                       (1) "L'homme qui marche" ("The walking man" ) which is a life size bronze sculpture . (You can see an image of it on the back of the bill of 100 Swiss francs ).

                       (2) "Les 3 hommes qui marchent " ("The 3 walking men II" ) ,1949 . Another sculpture .

                       Some drawing of his elongated scultpures are :
                       (3) "Sculptures" , 1950
                       (4) "Homme debout" ("Man standing") , 1957 .

Activity : The goal of this activity will be to have the students create a stick-like figure with pipe cleaners and glue it on a piece of white paper.The figure should be "moving" , for example walking , dancing , running , etc.

(1) Each student will be given 2 and a half pipe cleaners , as well as a white paper .
(2) With the first pipe cleaner , the student will make the head by twisting a circle . Like this :


 .
(3) The student will then fold the end of the pipe cleaner to make a foot .
(4) He/she will take the half pipe cleaner to make the second leg . Fold the end of it to create the foot and attach it to the main pipe cleaner by twisting it around the body . Just like this :


(5) He/she will twist the last pipe cleaner around the upper body to make the arms . The student should give it the desired shape so the figure will look like they are dancing , running etc. This one looks like he is trying to catch someone or something :


(6) Once this is done the only thing left to do is to glue the pipe cleaner on the white paper and let it dry .


Tada ! It is finished . It is a very simple project to do with your students . Have fun :)

Wednesday, August 28, 2013

Papier Mâché Bears (part 1)

I would like to introduce a new art lesson for the beginning of the school year . Some teachers (especially kindergarten teachers ) like to start the year with a unit on bears. If you are one of them , or if you are planning to read the book "Brown Bear, Brown Bear , What Do You See ?" by Eric Carle , or any other book about bears ....then this lesson may be a fun activity to go along with . We are going to make some bears in papier mâché .

Grade level: You can do that with any grade . If you have younger students , you may want to have a helper in your classroom . Older students may add more details on their project .

Objective : To create a 3D sculpture . It is always nice to explore new art form that goes beyond a piece of paper .

Resources : You can find plenty of resources online , starting with information on papier mâché , as well as different projects . You will even find different recipes on how to make your papier mâché paste . Just look around and choose what you need for your lesson . Just remember to always name your source !

Definition : What is papier mâché ? "Papier mâché" means "chewed paper" in French . But obviously you are not going to ask your students to chew newspaper pieces  ;) Something made out of papier mâché is something made out of paper pieces (usually newspaper) glue together with a special paste . This paste can be a special glue , wallpaper paste or some flour mixture . I usually choose the last one as it is the most affordable and it does the job really well .
When you make papier mâché , you usually use a "base" like a balloon , chicken wires or aluminium foil . You cover this base with strips of newspaper soaked in papier mâché paste . You make several coats of this and let it dry slowly . You will then paint over it to make your piece look nicer .

Material needed :  For this project we will need the following :

                            * newspapers . (It is a good idea to ask your students to bring newspapers a few weeks prior to the project .If you do this at the beginning of the year you may save newspapers during the summer or use leftovers of last year supply)
                            * aluminium foil
                            * masking tape
                            * scissors
                            * cardboards
                            * papier mâché paste (see recipe)
                            * white glue
                            * toothpicks
                            * small bowl (one per student where they will have their papier mâché mixture)
                            * white acrylic paint
                            * paintbrushes and small plastic cups

Papier mâché paste recipe : To make papier mâché paste is really easy and inexpensive ! You will find most ingredients in your pantry closet as they are : flour , water and salt . To see the step-by-step recipe click here.


Activity : (1) Have students cut with their fingers (no need for scissors here ) small strips of newspaper .(We do not need big strips as we are doing a rather small project .)
               (2) Each student should have two pieces of aluminium foil . One small that they will shape as a ball (that will become the head of their bear) and another slightly bigger . It will be shaped as an oval (it will become the body ). Each student should roll those two pieces on their desk until they become smooth . Make sure that the oval piece has a flat bottom (so it can stand straight ).


              (3) Add a toothpick to the body :


              (4) Add some white glue to the toothpick and to the top of the oval shape . Add the head :


              (5) Give each student four small additional pieces of aluminium foil . Two bigger pieces that they will roll on their desk in their length (like if they were making a worm with play dough ). They will become the arms of the bear .And two tiny pieces that will be shapes like balls and will be the feet . Make each piece smooth , by rolling them on the desk .Here is what you will get :


               (6) Now your students will need to cover all those six pieces (the head and body , the two arms and the two feet ) with newspaper .To accomplish that they should take one piece of newspaper strip at a time , dip it in the papier mâché mixture , gently squeeze the extra paste and cover the head . They should keep doing this step until the entire bear is covered .They should start from the top of the bear ....and work their way to the bottom it make it easier that way.


So your students should have cover the entire body , the two arms and the two feet . Let it dry . Apply a second coat of newspaper soaked in paste . Let it dry .

               (7) Now they will have to attach the arms and the feet to the body somehow . That is pretty simple actually . Let's start with the arms . Attach each arm with a couple of piece of masking tape to the back of the body , just like that :


Don't worry about aesthetics right now ....the tape will soon be covered up with newspaper :)

               (8) The feet are a little more trickier . If you have young students , you and your helper may want to do this .You will need to break a toothpick in a smaller piece and insert it into the foot , like this :


 Add a little bit of white glue and insert the toothpick inside the body now .....so it will look like this :


Follow the exact same step for the second foot :


               (9) Because you do not want the arms and the feet to come off , your students will have to apply some newspaper  dipped in papier mâché paste and cover the back of the arms and the feet .This way they will make sure they are all well attached to the body .


As you can see , the feet are now firmly secured and the tape (from) the arms are no longer visible :


               (10) Now is time to make the ears . This is quite easy .Have your students grab a small piece of cardboard and draw two half circles on it .


                 (11) They should cut them with scissors and attach them to the head of their bear . For that they will need once again a little bit of masking tape (one on each side of the ear ) :


And once again ask your students to cover the ears with small pieces of newspaper dipped in papier mâché paste .


Each bear should now look like this :


  Let them dry overnight !

          (12) The following day , each student will be able to paint some white acrylic paint over the newspaper , starting from the top and working their way to the bottom :


Each students should apply two coats of white acrylic paint . The bears should now look like this :


Here ! We are done for now ! The bears will have to dry . In the next lesson the students will give the bears their personality by painting them with acrylic paints  :)


Wednesday, July 10, 2013

Under the Sea Creatures ...

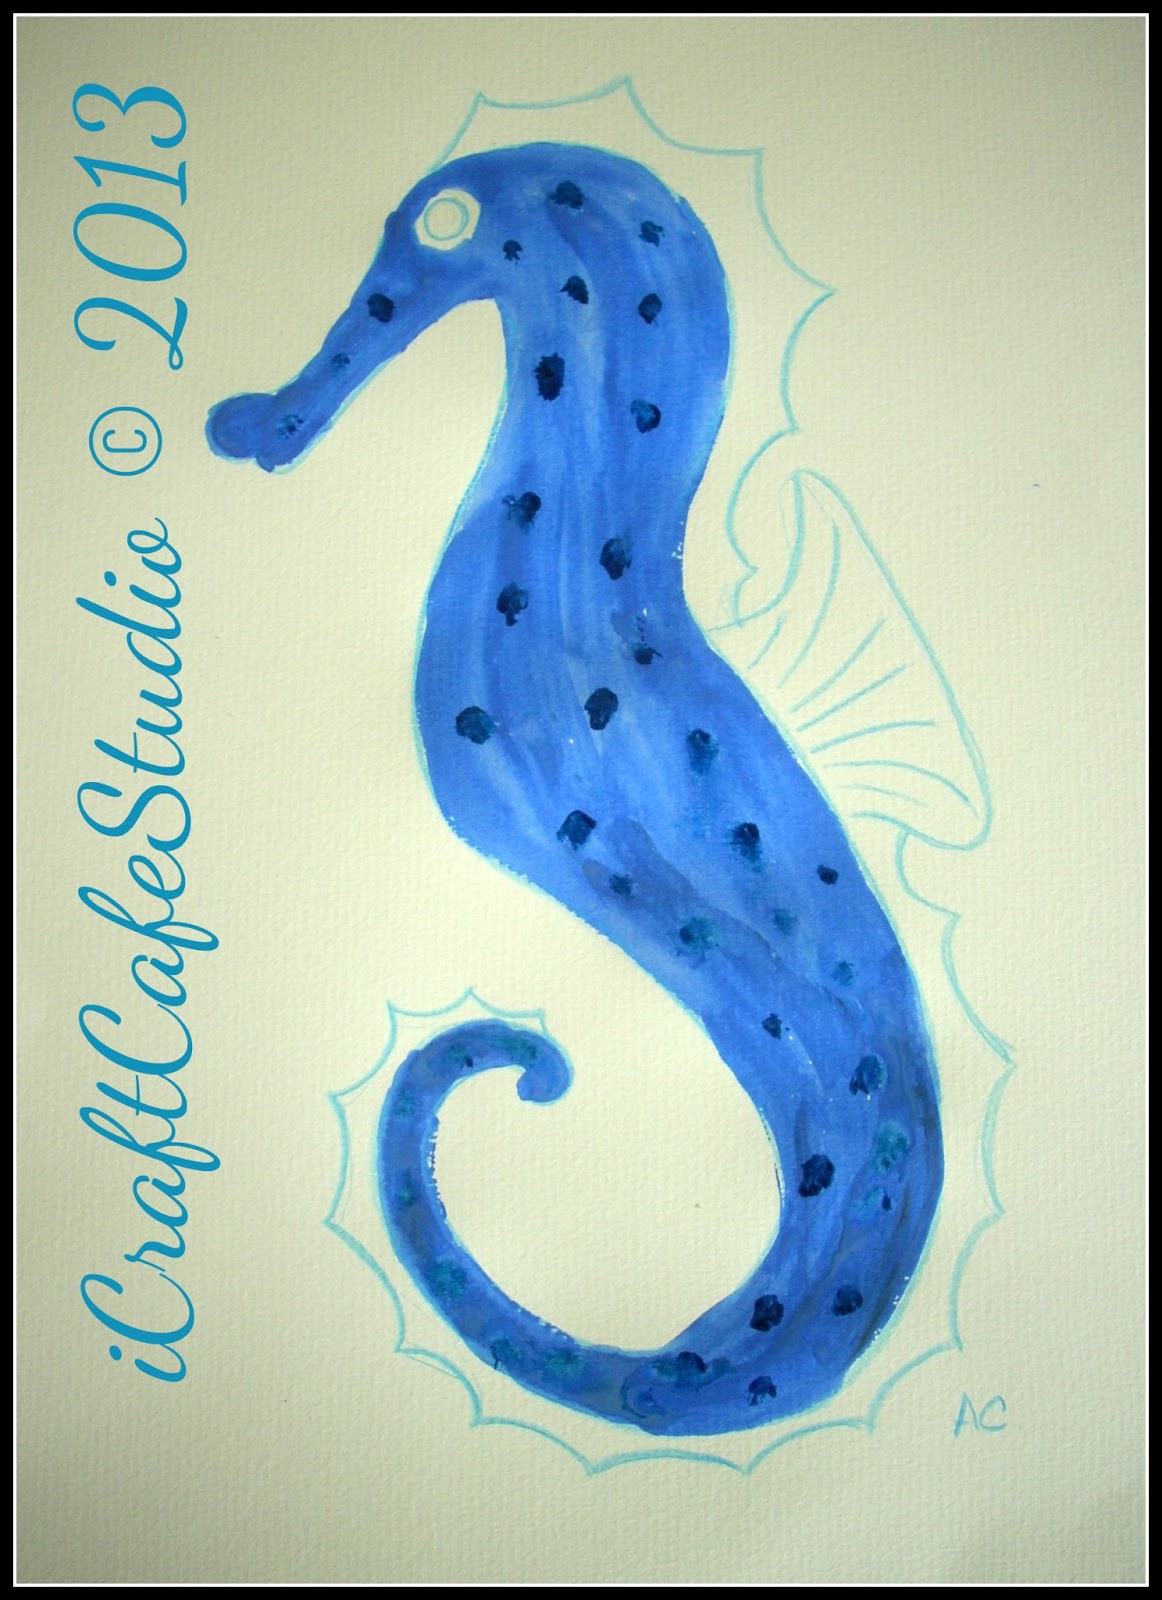
Hi everyone . I am back today with a new art project . Since a lot of kids are off from school , it is summer and it is hot , I thought it would be a perfect time to do some ....painting !  It is a wonderful activity that you can easily do in the backyard .And since some of you might like going to the beach , I thought it would be fun to create some underwater creatures . So let's get started !

Grade level : it can be done with any child who can hold a paintbrush . But I would say it is more geared toward children 6 and over .

Objective : To paint an underwater animal giving it the impression it is swimming .

Resources : This lesson is not my idea . It was based on the following book :The Usborne Book of ART skills . If your child likes art , you may want to purchase this book or to borrow it at the library . It is full of really cool projects !


Material needed :  * a watercolor paper 9X12"
                             * pictures of under the sea creatures (such as seahorses , fish , dolphins , whales , starfish , etc.)
                             * a blue pencil
                             * watercolor paints (blue and green ...more colors if you wish )
                             * paintbrushes
                             * plastic cups (for water)
                             * paper towels
                             * clear  plastic wrap

Activity : (1) Each child should have a piece of paper . They should choose an underwater animal to draw.
                (2) Each child will now draw the outline of the underwater creature they chose with a blue pencil .


                (3) They should paint the inside of the sea creature with a blue paint .


                (4) Then add some dots before the paint dries , so the paint will run .


                (5) If you kid wants , he /she may add a second color . In this example , I chose to add some purple .


                 (6) The next step will be to paint the paper around the animal with clean water .

                 (7) While the paper is still wet , your child should add some strokes of blue watercolor and some green .

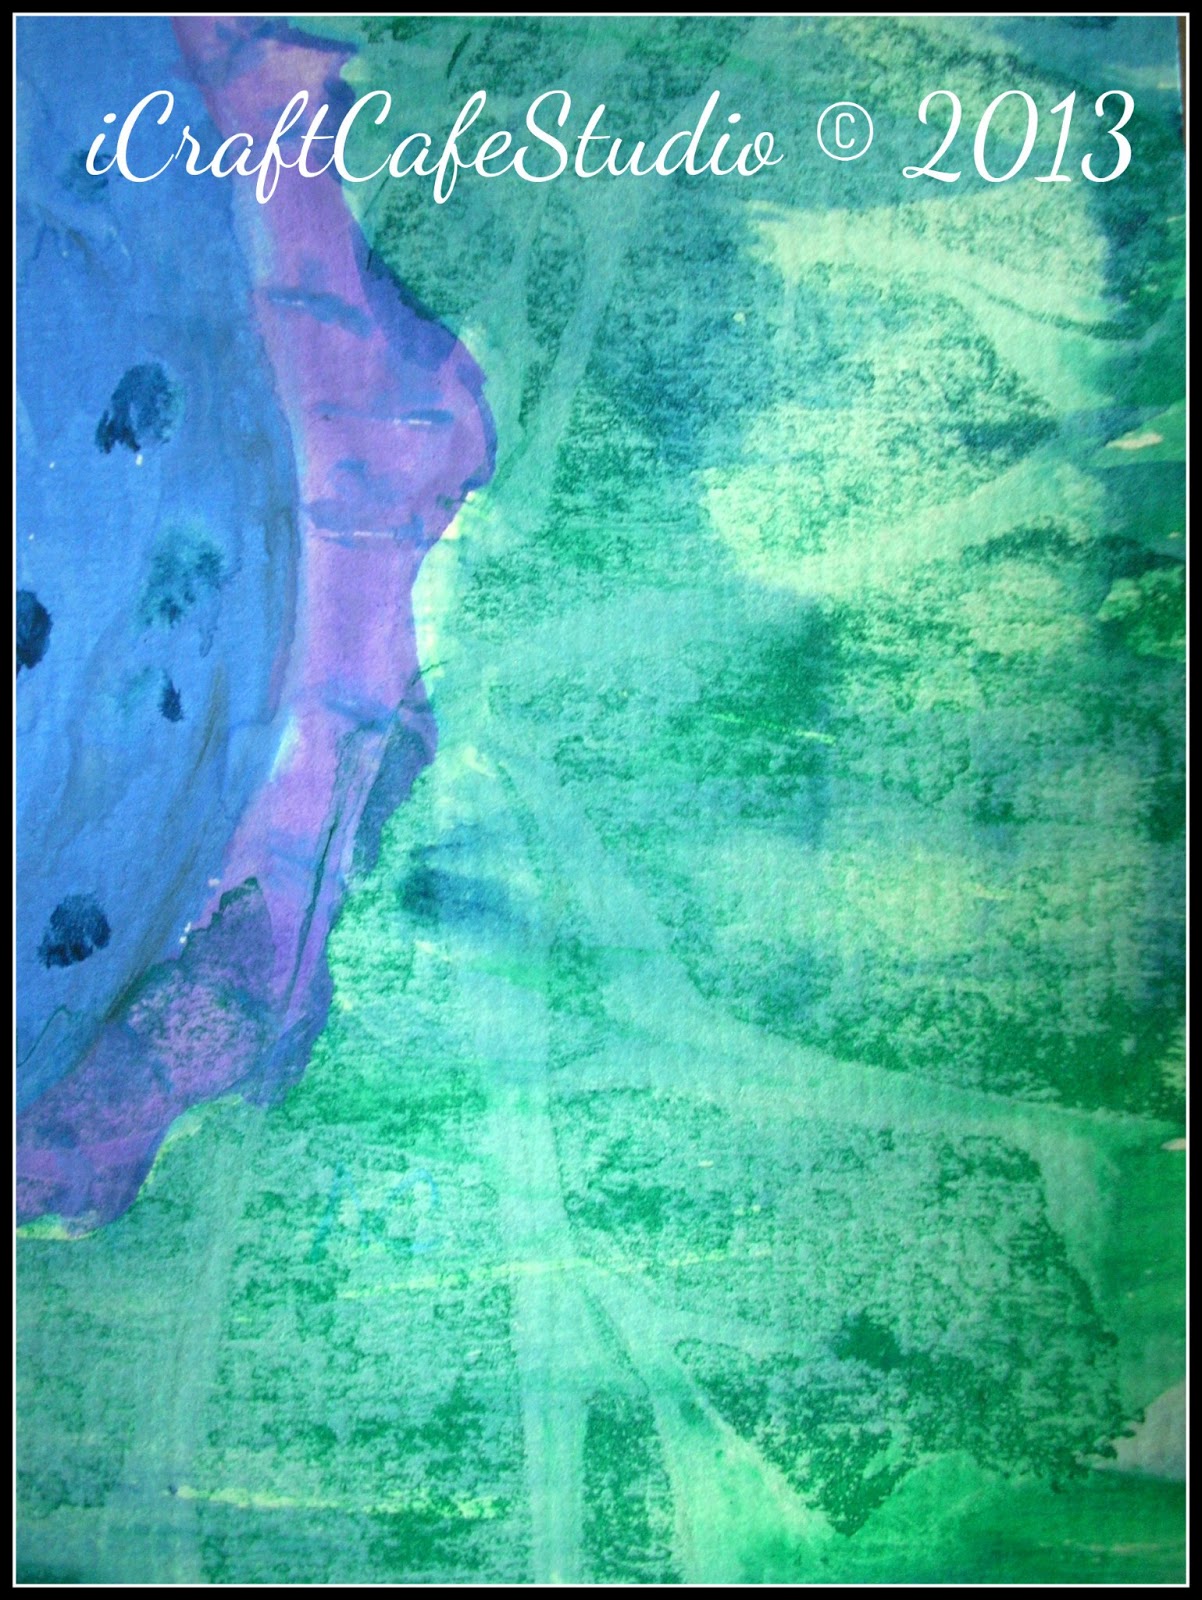
                 (8) Then while the paint is still wet , take a piece of clear plastic wrap and put is on the painting . Let it dry ....


And voilà ! Here is the effect of the clear plastic wrap up close :


Can you see it ? It is pretty cool isn't it ? And here is a view from the entire painting :


I hope your kids had some fun during this project . Enjoy the rest of your week and stay safe =)

Thursday, January 24, 2013

Salt dough magnets and plaque (Part 2)

In this second part of the lesson , we will make some magnets and a plaque . This is one of the most exciting process in this project .

Materials needed:
                               * Some salt dough we made last week  (give each student a generous amount so he/she will be able to make two magnets and one plaque)

                               * A rolling pin

                               * Some plastic knives (to cut the dough neatly)

                               * Some toothpicks (to make designs on the dough)
   
                               * Some plastic straws

                               * Small plastic cups for water

                               * Some plastic picture frames 5" X 8" (to measure the plaque )

                               * Wax paper

                               * You may want to have some flour handy , in case things get too sticky .

Project :
              Start by covering each desk with wax paper .

              (1) Each students will start by kneading the dough a little bit to get rid of the air bubbles .

              (2) Each student will then roll the dough flat with the rolling pin . He/she will use the plastic picture frame to measure the size of the plate . With a plastic knife he/she will cut around the frame . We now have the base of our plaque .

              (3) Use a plastic straw to make two holes at the top of the plaque (so we will be able to put a ribbon through later on , to hang the plaque) .

             (4) Now each student can decorate their plaque the way they want to . They can add flowers , ice cream , make a cat or a dog , or simply make a landscape . It is really up to their imagination ! When they add additional pieces of dough on the plaque , they should "glue" it by adding a little bit of water .

             (5) The student can add details to their design , by using toothpicks , a plastic knife ,a straw , etc.

             (6) Once the student is done with the plaque , he/she should set it aside on his/her desk .

             (7) With the extra dough that a student has , he/she can now make a couple of magnets , once again , simply ,using their imagination . They should just use the dough as they would using play dough . They can once again add details by using toothpicks , a plastic knife or a straw .

             (8) After the student is done , they should set the magnets aside on the wax paper .

Teacher's job :
Once every students are done with their salt dough art , it will be the teacher or art docent's job to bake every single piece . BE AWARE ! It will take some time . Use the oven at 350 F . The magnets could take about 2 hours (depending on their sizes ) and the plaques about 4 hours . Make sure each piece is completely dry on BOTH sides !!!!!!!!

Examples: Here are some examples of magnets and one plaque after they were baked .

 
A glass of refreshing lemonade . Look how the lines on the lemon and on the straw were added by using a plastic knife .

 
An apple on a book .

 
A cactus . This time the details were added with a toothpick .

 
A little mermaid . The mermaid , the flowers and the algae were all modeled separately and then glued onto the plaque by using water . As you can noticed , there is already a little bit of paint on this item , which bring us to our lesson next week  ,where I will explain how to paint and varnish the items . We will also add all the other finishing touches . 


Monday, July 30, 2012

Georgia O'Keeffe's Flowers

Grade Level : 3rd graders .


Objectives : The children will look at the paintings of Georgia O'Keeffe and attempt drawing a close-up of a flower themselves .


Material :  *real flowers for students to look at
                  * Color construction paper 12' X 12'
                  * white and color chalks


Biography : Georgia O'Keeffe was born on November 15, 1887 . She was the second of seven children and the oldest of five girls . Her mother made sure that her children had the best education possible . She especially wanted her five daughters to have the chance to learn a profession since it was becoming more acceptable for women to go to college and work . 
The O'Keeffe lived in a farm in Sun Prairie, Wisconsin .
From age 5 , she attended Town Hall School ( a nearby schoolhouse ). When she was 11 (along with her two younger sisters) , she took weekly private drawing and painting lessons . Georgia loved these lessons and she progressed very quickly .From then on , her artistic talents were recognized by her teachers and by her parents who encouraged her to go to art college after graduating from high school . 
In 1905 , she studied at the Art Institute of Chicago and learned traditional art . In 1907 she enrolled at the Students Art League in New York. 
Georgia liked New York City . It was busier and more exciting than the peaceful farm where she had grown up . Whenever she was in New York City , she often visited a small gallery that showed the work of new artists . It was owned by a well-known photographer named Alfred Stieglitz .
After finishing school , she traveled to Texas , where she decided to teach art . She found it an exciting place to be and very inspiring . At this time , she would teach art during the school year and take classes in New York during the summer .
Alfred Stieglitz became very interested in her artwork and asked her to come back to New York , where she could paint and he would promote her paintings in his gallery . The two will eventually get married . Georgia moved to New Mexico after her husband death . She died in 1986 (at the age of 96 ) in Santa Fe , New Mexico .
Georgia O'Keeffe is the only woman in the United States to have a museum dedicated solely to her works . This museum is the Georgia O'Keeffe Museum and it is located in Santa Fe  , New Mexico .


Resources : You will show the students several paintings of flowers made by Georgia O'Keeffe . Here are some examples of what you could look at :
(1) "White trumpet flower"
(2) "White flower on Red Earth "
(3) "Blue flower"
(4) "Poppy"
(5) "purple petunia"
and so on . Notice how she doesn't draw the entire flower , but how she draw a part of the flower , a little bit like if she would zoom in on the flower with a camera , showing us a "close-up shot" ? The way she paints those flowers is just amazing as well . They look so soft , so real , so colorful .


Activity : (1) Students will observe the flower they want to draw .
                (2) Using both hands , they should form a "rectangle" and use this "rectangle" to look at the flower , as if it were a camera . It will help them to draw a close-up of the flower .
                (3) Using a white chalk , they will draw the outline of their flower .
                (4) Once they like what they see , they will add color to their flowers and their background , using the color chalks . The flower should fill out most of the paper .


Examples:


Friday, April 27, 2012

ACEO cards

Grade level : Any level between 1st grade and 5th grade .


Artist concept and skills : Create a series of ACEO cards .


Material needed : * white cardboard paper 2 1/2 by 3 1/2 inches
                            
                            * color pencils , sharpies or crayons .


                            * if you decide to make a series on animals  , have pictures of birds , cats , dogs , lions , etc available for your students to look at .


                            * you may want to show examples of ACEO cards .


Vocabulary : What is an ACEO card ? ACEO stands for art card editions and originals . It is also sometimes called ATC cards (Artist Trading Cards ) . It is a miniature work the size of a modern baseball card . It measures 2 1/2 inches by 3 1/2 inches . The ACEO movement started in Switzerland . Those cards can be produced in any media . From dry media (pencils , pens , markers , etc.) , wet media ( watercolors , acrylic paints , etc.) to paper media (collage , papercuts , etc.). Some cards are even made of metals or cloth . Those cards are trade and exchanged .
ACEO/ATC cards are usually created in a series of three or four cards representing a theme (like beach , animals , pets , birds , or landscape , etc)


Project : In this project ,each student will create a serie of ATC/ACEO cards . In this example below I chose the theme animals. 
              (1) Each students will be given 3 blank cards (measuring each 2 1/2 by 3 1/2 inches )
              (2) Each student will have to decide what animals they want to draw , and then draw ONE animal on each card , using either color pencils , sharpies or crayons.


              (3) On the back of each card the students should include the following information :
                               Title (A Lovely Owl)
                               Artist name : (AC)
                               Date (April 17 , 2012)
                               Number (1 of 1)
                               Signature (there should be a signature from the artist .)


Example of an animal series :
                               

Have fun !
A great variation of this lesson is the following . Have students draw their own self-portrait on a regular piece of paper . The teacher will then scan those portraits and print them the size of 2 1/2 by 3 1/2 inches . Print as many copies as you have students . At the end of the year party , give each student a pack of those self-portraits and have each student sign their own portrait . It will build great memories !