Showing posts with label kids craft. Show all posts

Tuesday, October 7, 2014

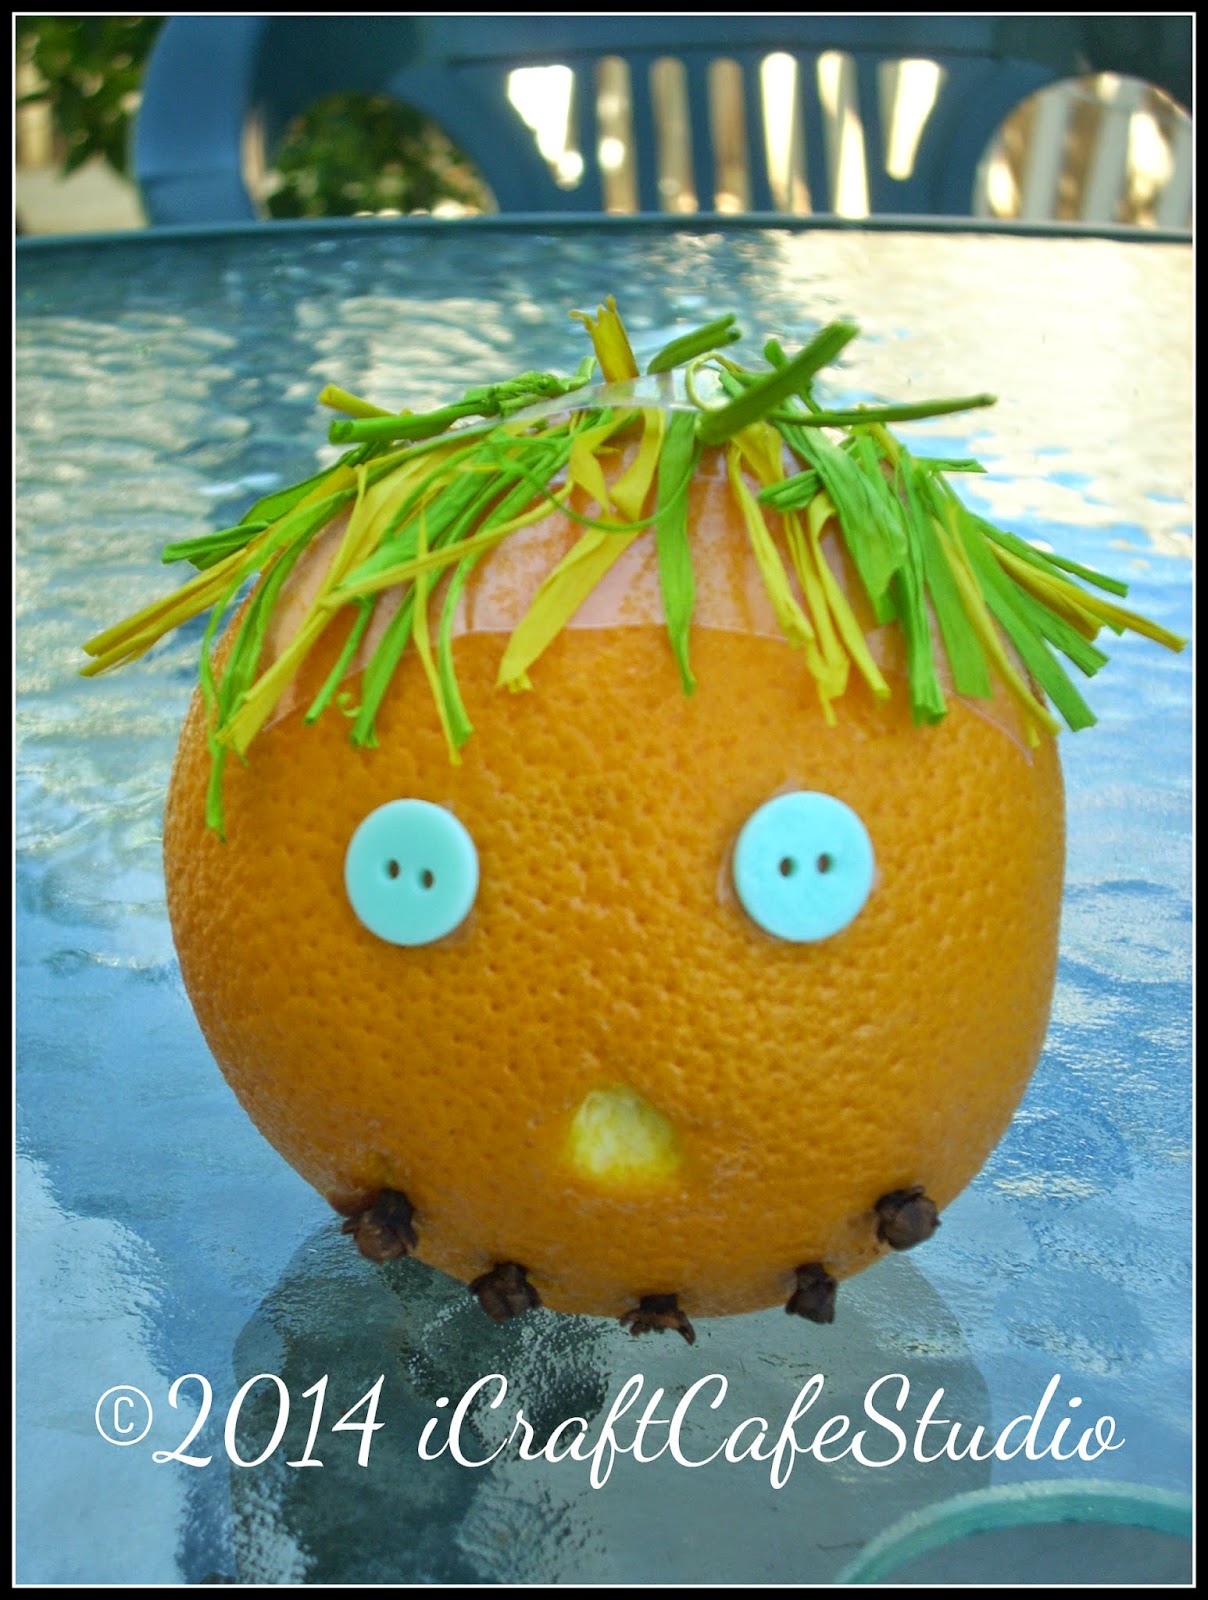
Fall little orange poeple

Hi . I would like to share an easy craft project to do with your young students (or children) .It is a project inspired by fall and Halloween . If you have parents/teacher conferences this month , it is a great way to decorate the kids desk . Have fun !


Grade level: It is an easy and simple craft for preschoolers and kindergartners .

Mat;rial needed : For this , you will need :

                                                                    * oranges (1 per child)
                                                                    * yarn or raffia (one or more colors) Yarn is much easier to use , as raffia has a tendency to be stubborn ...young students might end up frustrated dealing with it ..
                                                                    * a pencil or pen
                                                                    * a knife (to be use by an ADULT ONLY !!!)
                                                                    * some white glue or double sticky tape
                                                                    * a pair of scissors
                                                                    * some buttons (for eyes)
                                                                    * some cloves (for eyes or mouth)


Now that you have all the material needed you are ready to start :)

Activity:  Each child will use their imagination to create  a head with their orange . Once finished , it will decorate their desk . If you do that at home , you can decorate the table with them :) Ok , let's go to work !

                (1) The first thing the child needs to do is to draw eyes and a mouth with their pen or pencil . Just like this ...


                      (2) Once the outlines of the eyes and mouth are clearly visible , the student should bring the orange to the teacher , so the teacher (or adult) can remove the skin with a knife , leaving a white space . Here is how it will look like :

                       
                     (3) The student can then add cloves for the pupils .


                     (4) It is now time to take care of the hair .I do prefer to use yarn over raffia as it is easier to manipulate .With raffia , children may easily get frustrated . The child can choose one or more colors of yarn .. He/she swill cut a fair amount of small pieces (that will fit neatly on the "head" .)

                     (5) He/she will then pour some glue on the top of the orange (you may opt to use double sticky tape instead of the glue) :


and add the pieces of yarn one by one to cover the entire head ...


And it is done ! Isn't it cute to decorate the students desk ? And so easy to do !

Here is another example . This one has buttons for eyes , double sticky tape instead of glue and raffia for hair .


Here is a look at both of them together :


As I said they make a sweet student's desk decoration in a classroom , or fall display at home .


I hope you got inspired . Have a wonderful week :)

Wednesday, August 28, 2013

Papier Mâché Bears (part 1)

I would like to introduce a new art lesson for the beginning of the school year . Some teachers (especially kindergarten teachers ) like to start the year with a unit on bears. If you are one of them , or if you are planning to read the book "Brown Bear, Brown Bear , What Do You See ?" by Eric Carle , or any other book about bears ....then this lesson may be a fun activity to go along with . We are going to make some bears in papier mâché .

Grade level: You can do that with any grade . If you have younger students , you may want to have a helper in your classroom . Older students may add more details on their project .

Objective : To create a 3D sculpture . It is always nice to explore new art form that goes beyond a piece of paper .

Resources : You can find plenty of resources online , starting with information on papier mâché , as well as different projects . You will even find different recipes on how to make your papier mâché paste . Just look around and choose what you need for your lesson . Just remember to always name your source !

Definition : What is papier mâché ? "Papier mâché" means "chewed paper" in French . But obviously you are not going to ask your students to chew newspaper pieces  ;) Something made out of papier mâché is something made out of paper pieces (usually newspaper) glue together with a special paste . This paste can be a special glue , wallpaper paste or some flour mixture . I usually choose the last one as it is the most affordable and it does the job really well .
When you make papier mâché , you usually use a "base" like a balloon , chicken wires or aluminium foil . You cover this base with strips of newspaper soaked in papier mâché paste . You make several coats of this and let it dry slowly . You will then paint over it to make your piece look nicer .

Material needed :  For this project we will need the following :

                            * newspapers . (It is a good idea to ask your students to bring newspapers a few weeks prior to the project .If you do this at the beginning of the year you may save newspapers during the summer or use leftovers of last year supply)
                            * aluminium foil
                            * masking tape
                            * scissors
                            * cardboards
                            * papier mâché paste (see recipe)
                            * white glue
                            * toothpicks
                            * small bowl (one per student where they will have their papier mâché mixture)
                            * white acrylic paint
                            * paintbrushes and small plastic cups

Papier mâché paste recipe : To make papier mâché paste is really easy and inexpensive ! You will find most ingredients in your pantry closet as they are : flour , water and salt . To see the step-by-step recipe click here.


Activity : (1) Have students cut with their fingers (no need for scissors here ) small strips of newspaper .(We do not need big strips as we are doing a rather small project .)
               (2) Each student should have two pieces of aluminium foil . One small that they will shape as a ball (that will become the head of their bear) and another slightly bigger . It will be shaped as an oval (it will become the body ). Each student should roll those two pieces on their desk until they become smooth . Make sure that the oval piece has a flat bottom (so it can stand straight ).


              (3) Add a toothpick to the body :


              (4) Add some white glue to the toothpick and to the top of the oval shape . Add the head :


              (5) Give each student four small additional pieces of aluminium foil . Two bigger pieces that they will roll on their desk in their length (like if they were making a worm with play dough ). They will become the arms of the bear .And two tiny pieces that will be shapes like balls and will be the feet . Make each piece smooth , by rolling them on the desk .Here is what you will get :


               (6) Now your students will need to cover all those six pieces (the head and body , the two arms and the two feet ) with newspaper .To accomplish that they should take one piece of newspaper strip at a time , dip it in the papier mâché mixture , gently squeeze the extra paste and cover the head . They should keep doing this step until the entire bear is covered .They should start from the top of the bear ....and work their way to the bottom it make it easier that way.


So your students should have cover the entire body , the two arms and the two feet . Let it dry . Apply a second coat of newspaper soaked in paste . Let it dry .

               (7) Now they will have to attach the arms and the feet to the body somehow . That is pretty simple actually . Let's start with the arms . Attach each arm with a couple of piece of masking tape to the back of the body , just like that :


Don't worry about aesthetics right now ....the tape will soon be covered up with newspaper :)

               (8) The feet are a little more trickier . If you have young students , you and your helper may want to do this .You will need to break a toothpick in a smaller piece and insert it into the foot , like this :


 Add a little bit of white glue and insert the toothpick inside the body now .....so it will look like this :


Follow the exact same step for the second foot :


               (9) Because you do not want the arms and the feet to come off , your students will have to apply some newspaper  dipped in papier mâché paste and cover the back of the arms and the feet .This way they will make sure they are all well attached to the body .


As you can see , the feet are now firmly secured and the tape (from) the arms are no longer visible :


               (10) Now is time to make the ears . This is quite easy .Have your students grab a small piece of cardboard and draw two half circles on it .


                 (11) They should cut them with scissors and attach them to the head of their bear . For that they will need once again a little bit of masking tape (one on each side of the ear ) :


And once again ask your students to cover the ears with small pieces of newspaper dipped in papier mâché paste .


Each bear should now look like this :


  Let them dry overnight !

          (12) The following day , each student will be able to paint some white acrylic paint over the newspaper , starting from the top and working their way to the bottom :


Each students should apply two coats of white acrylic paint . The bears should now look like this :


Here ! We are done for now ! The bears will have to dry . In the next lesson the students will give the bears their personality by painting them with acrylic paints  :)


Friday, February 1, 2013

Salt dough magnets and plaques (Part 3)

In this third lesson , we will finish our plaques and magnets . As a teacher , art docent or mother , you have baked your  students art projects and it is now time for the finishing touches .

Materials needed:   * Old newspapers to cover the desks

                               * paintbrushes of different thickness

                               * old rags or paper towel to wipe your paintbrushes

                               * plastic cups (for water)

                               * acrylics paints of different colors

                               * gloss and matte varnishes

                               * paper plates (for acrylic paints)

                               * round magnets

                               * super glue

                               * thin colorful ribbons

Project :  (1) Each student will get their magnets and their plaque back .

               (2) Each student should get a little bit of acrylic paints of different colors . They should paint their magnets and their plaque . This stage should not take them very long .

               (3) Let it dry for at least 24 hours .

               (4) The teacher or art docent can apply some varnish on all the pieces .

               (5) Using the super glue , glue a round magnet on the back of the small art pieces to make the magnets . Let it dry !

               (6) Attach a beautiful ribbon to each plaque .

Examples : Here are the finished pieces I showed you last week :

 
Glass of lemonade magnet

 
Apple on a book magnet

 
Cactus magnet

 
Little mermaid plaque


And here are more beautiful pieces :

 
A head magnet

 
A green head magnet

 
An army shark magnet

 
A kid plaque

 
An Arizona landscape plaque

Here it is . This project is now done ! I certainly hope that you and your students had a lot of fun creating your very own magnets and plaques . Have a wonderful weekend :)


Friday, December 16, 2011

Christmas cookies ...Yummy !!!

I first would like to apologize for not posting anything since late September but I have been incredibly busy ! Thanks you for being so patient with me .

This month I chose to share some Christmas cookies . As a mom , I think this is a wonderful thing to do with your children during the holiday season . In fact in my family I made this a tradition since my son was a toddler ....and now that he is much bigger...he still looks forward to make Christmas cookies .....but ..shhhhhhhhhhhh ! Don't tell him I told you =)

Of course you can choose your favorite Christmas cookie recipe , this is one that I like and this is what you will need :

* 4 eggs
* 2 sticks of margarine + 1 tablespoon (or 17 tablespoons)
* 1 cup of sugar
* 3 cups of flour
* 1 teaspoon of baking powder
* a tiny little bit of salt
* 1/2 pack of vanilla sugar
* zest of 1/2 lemon
* 1-2 egg yolk to make the cookies golden

(1) Beat eggs, butter and sugar until you obtain a smooth texture .
(2)
Combine flour, baking powder and salt in a bowl . Sift .
(3) Make a whole in the middle of the dry ingredients (flour , baking powder and salt) . Add the liquid ingredients (eggs , butter and sugar mixture) inside the whole , as well as the vanilla sugar and the lemon zest . Mix with your fingers . ( Some kids will love this part ...some will hate it...) Knead it until it becomes smooth and not sticky .
(4) Let the cookie dough rest for at least half an hour in the refrigerator .
(5) Roll the dough and c
ut it with your child's favorite cookie cutters.
(6) Arrange the cookies on a cookie sheet and
brush them with egg yolk .
(7) Bake the cookies in the middle of the oven until they become light yellow . It takes about 10 - 15 minutes in an oven at 350 F . (This should be a job for a grown up !)
(8) Let the cookies cool off .

(9) Mix some powder sugar with some lemon juice to make some icing (or use your own favorite icing .) Brush the cookies with the icing and add your favorite decoration before it dries !


Enjoy =o)

Friday, September 30, 2011

Cat in papier mâché , part 3

Part 3 .
Painting your cat .


Material needed :
* your cat in papier mâché
* gesso (or white acrylic paint)
* HB pencil
* acrylic paints (as many colors as possible )
* old newspaper (to cover the tables)
* paintbrushes of different thickness
* small cups of water (to rinse the paintbrushes)
* rags or paper towels (to wipe out paintbrushes )
* small plastic plates (one per student) to put a small amount of acrylic paints of different colors
* Varnish (to protect the paint from chipping off )

Activity :
(1) Each student should take their cat , now entirely covered with newspaper ...


and apply a couple of coats of gesso (or white acrylic paint). You should plan that one day ahead of the painting of the cat itself, so it has plenty of time to dry . If you are an art docent and are limited by time like I was (I only had one hour a month !) , you could go to school and apply the gesso on all the cats yourself . It will save you some time and ensure that all the students will have enough time to paint their cat entirely .


(2) Each student now has a "white" cat . They can take an HB pencil and draw the outlines of their cat's eyes , nose , a particular design , etc.


(3) Now they can choose the colors they want to paint their cat with and put a small amount of each color in a small plastic (or paper) plate . Ideally it would be a good idea to put two coats of paint , but again if time is limited , one coat of paint will do . Each student should have a small cup filled with water to rinse their paintbrush , and a rag to wipe it out .


Here is the finished cat ...


Once the paint is dry , don't forgot to apply some varnish to protect the cat . (It will prevent the paint to chip off too easily .) I would suggest that you do day the day after the painting .

Other examples of cats :

When I did this project with these 5th graders , the teacher had a classroom filled with "Garfield"... so we made some "Garfield" cats...Here is an example from one of the students ...

Examples of cats with random designs...


A black cat. Perfect for...Halloween ...


I hope you and your students or children had fun =0)